Unity fundamentals / 04
Connecting a C# script editor
Select VS Code as Unity's external script editor and create a Move script in a Scripts folder.
On this page

Today's goal is to connect the Visual Studio Code installation from the previous lesson to Unity and prepare a script for movement. First, open Unity.
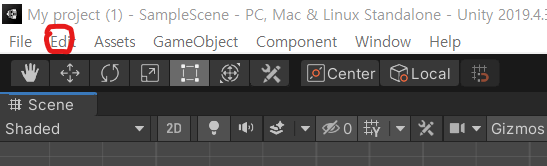
Open Edit:
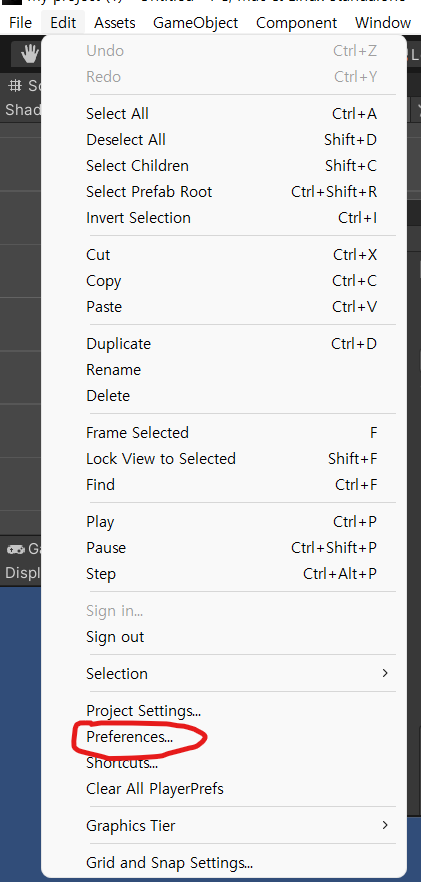
Go to Preferences → External Tools → External Script Editor, and choose Visual Studio Code. In the original setup, if the editor is missing, the tutorial asks you to check the extensions installed in lesson 3. In practice, available editor integrations also depend on your Unity version and installed integration packages.
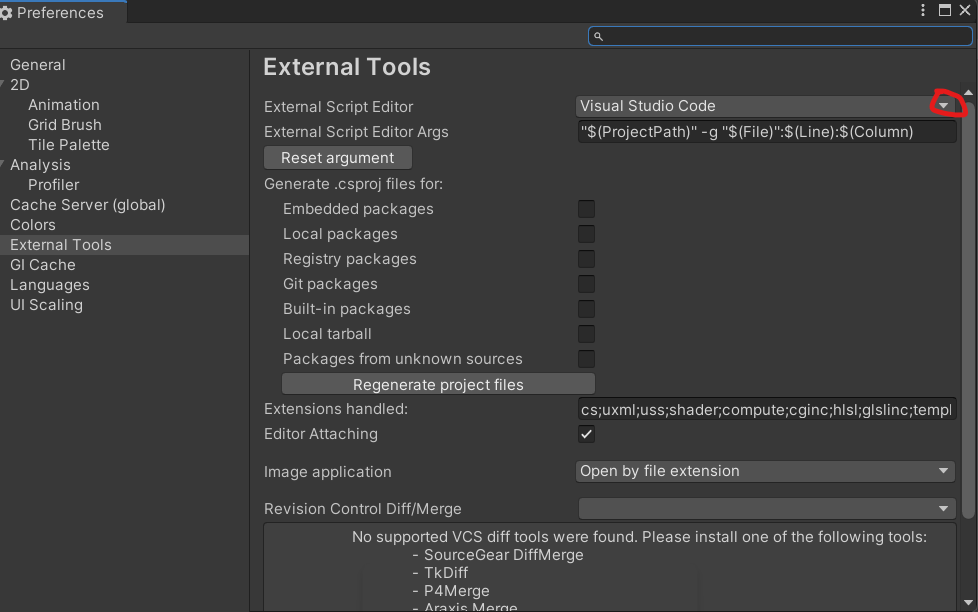
Use the highlighted dropdown arrow to select the editor.
Create the script
In the Project window's Assets area:
- Right-click and choose Create → Folder.
- Name the folder Scripts. Another folder name is also fine.
- Open it and choose Create → C# Script.
- Rename the new script to Move.
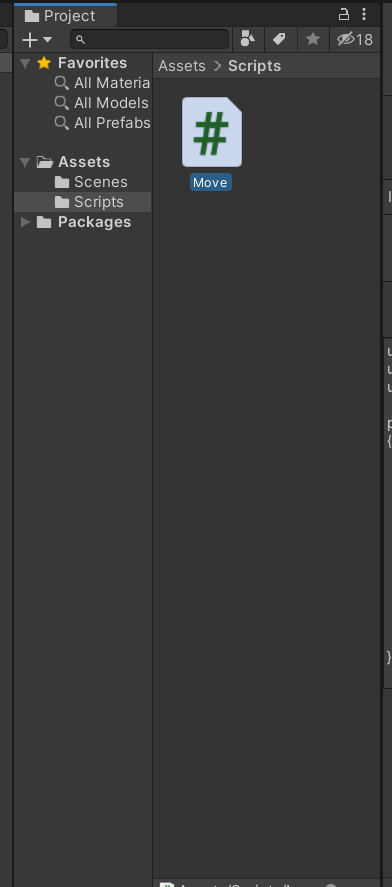
The original introduction mentions writing movement code, but this installment ends after editor integration and script creation. The following lessons explain the script and add movement.
Moved here from Tistory
I migrated this post from my Korean Tistory blog, I am Jason Lee, to this website and translated it into English. My writing and projects now live together in one place.
The original publication date, code examples, and screenshots are preserved. Editorial notes clarify known issues in the original material.
Original post on Tistory English edition · Aug 30, 2026